
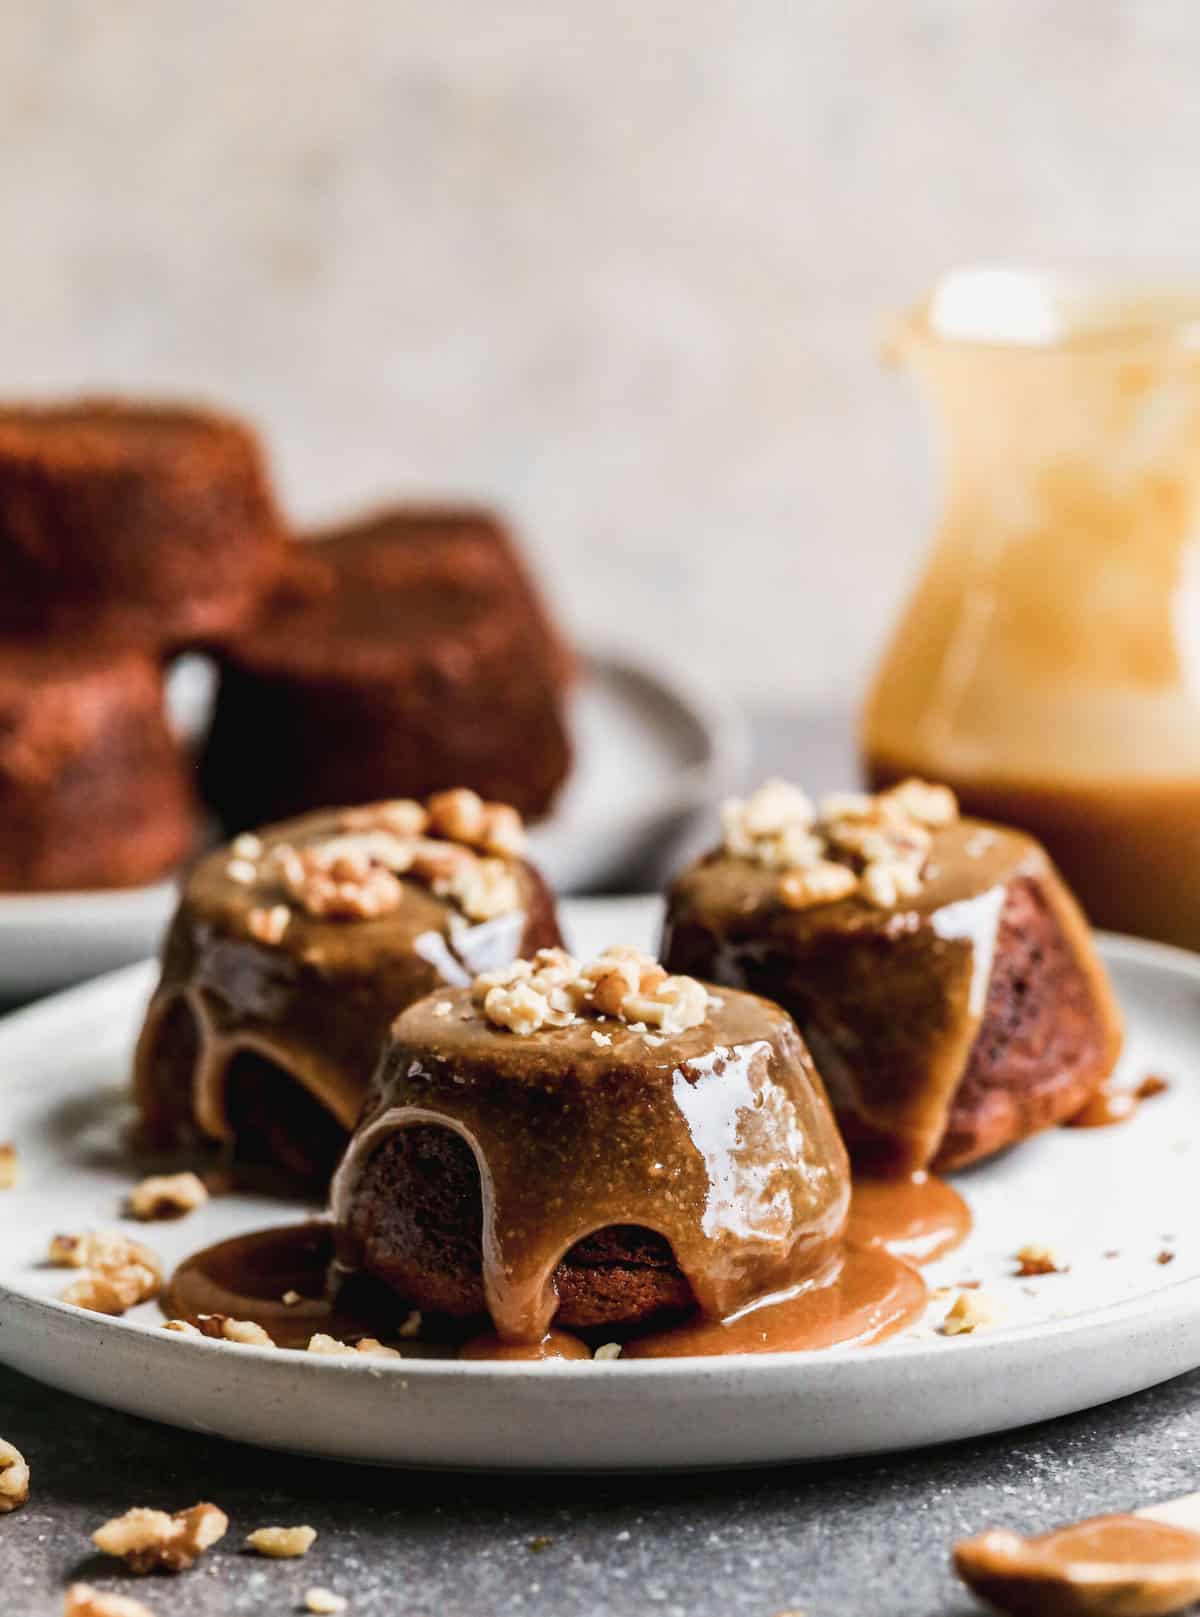
Our favorite Sticky Toffee Pudding recipe makes cute individual servings of warm and gooey cake topped with warm toffee sauce.
Another dessert you can try with a similar texture but completely different flavor is my Gingerbread Cake. Or if you’re looking for more toffee flavor, check out my other toffee recipes.
Why I love this recipe:
- Easy: We can thank the English for blessing the world with the deliciousness that is Sticky Toffee Pudding (aka sticky date pudding), and believe it or not, you already have most of the ingredients in your pantry.
- Mini cakes: I love baking the sticky toffee pudding in muffin tins, for cute individualized portions. You could also bake the cake in an 8 inch square pan.
- Flavor: It’s so flavorful and rich, especially with the sauce on top, and finished with a dollop of whipped cream or ice cream, so you can savor every bite.
How to Make Sticky Toffee Pudding:
- Preheat the oven to 350 degrees F. Lightly grease a 12-cup muffin tin, ramekins, or an 8’’ baking dish.
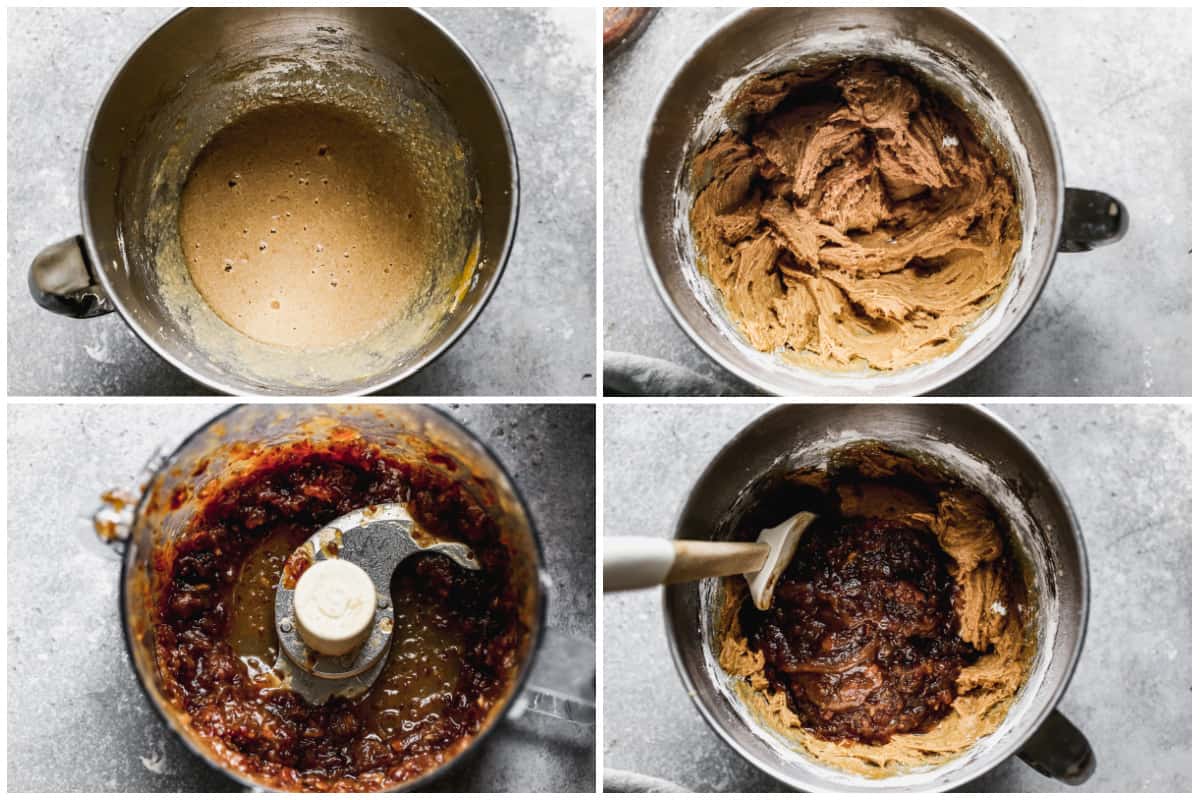
- Chop Dates: Add the dates to the bowl of a food processor or blender then pour boiling water on top. Rest for 5 minutes, the pulse them in a food processor. Stir in baking soda.
- Prepare Batter: In a separate bowl add butter and brown sugar and mix well to combine. Stir in eggs. Add the molasses and mix. In a separate bowl, sift together flour, baking powder, and salt, then stir into the batter. Add chopped dates, folding them in to combine.
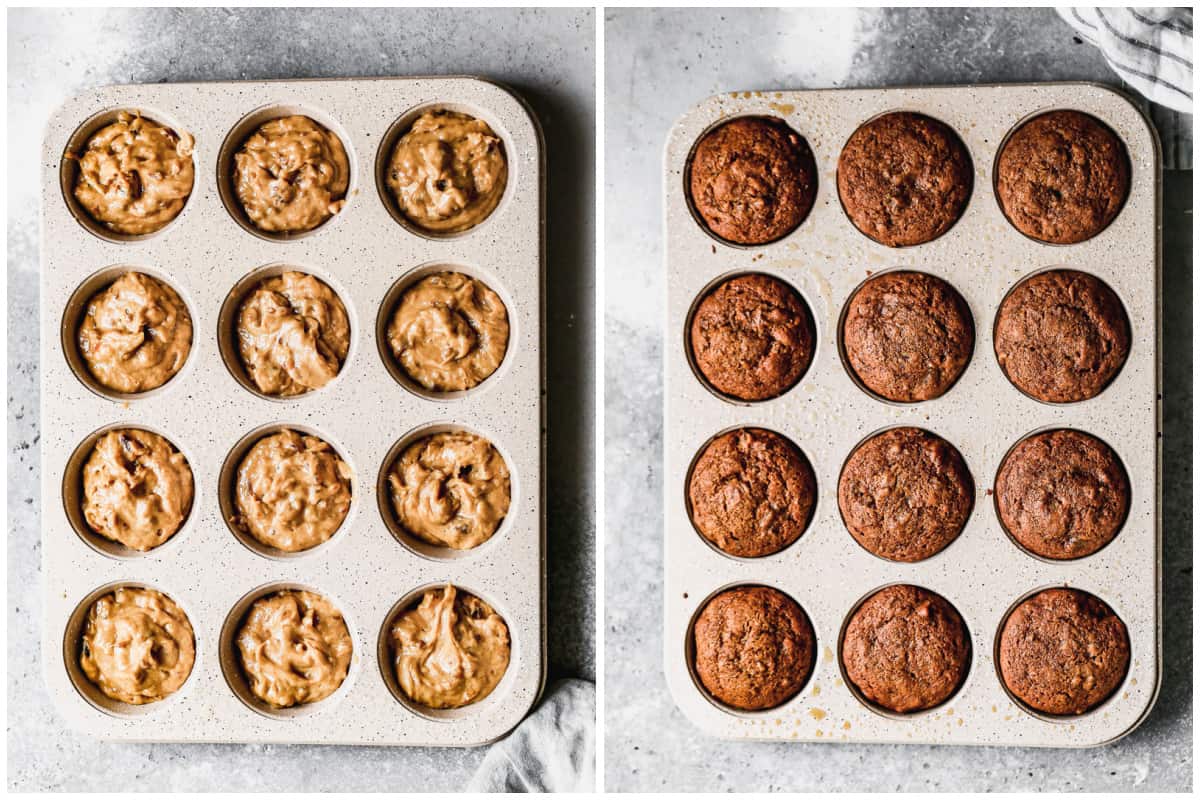
- Bake: Pour batter into prepared pan and bake for about 18 – 20 minutes.
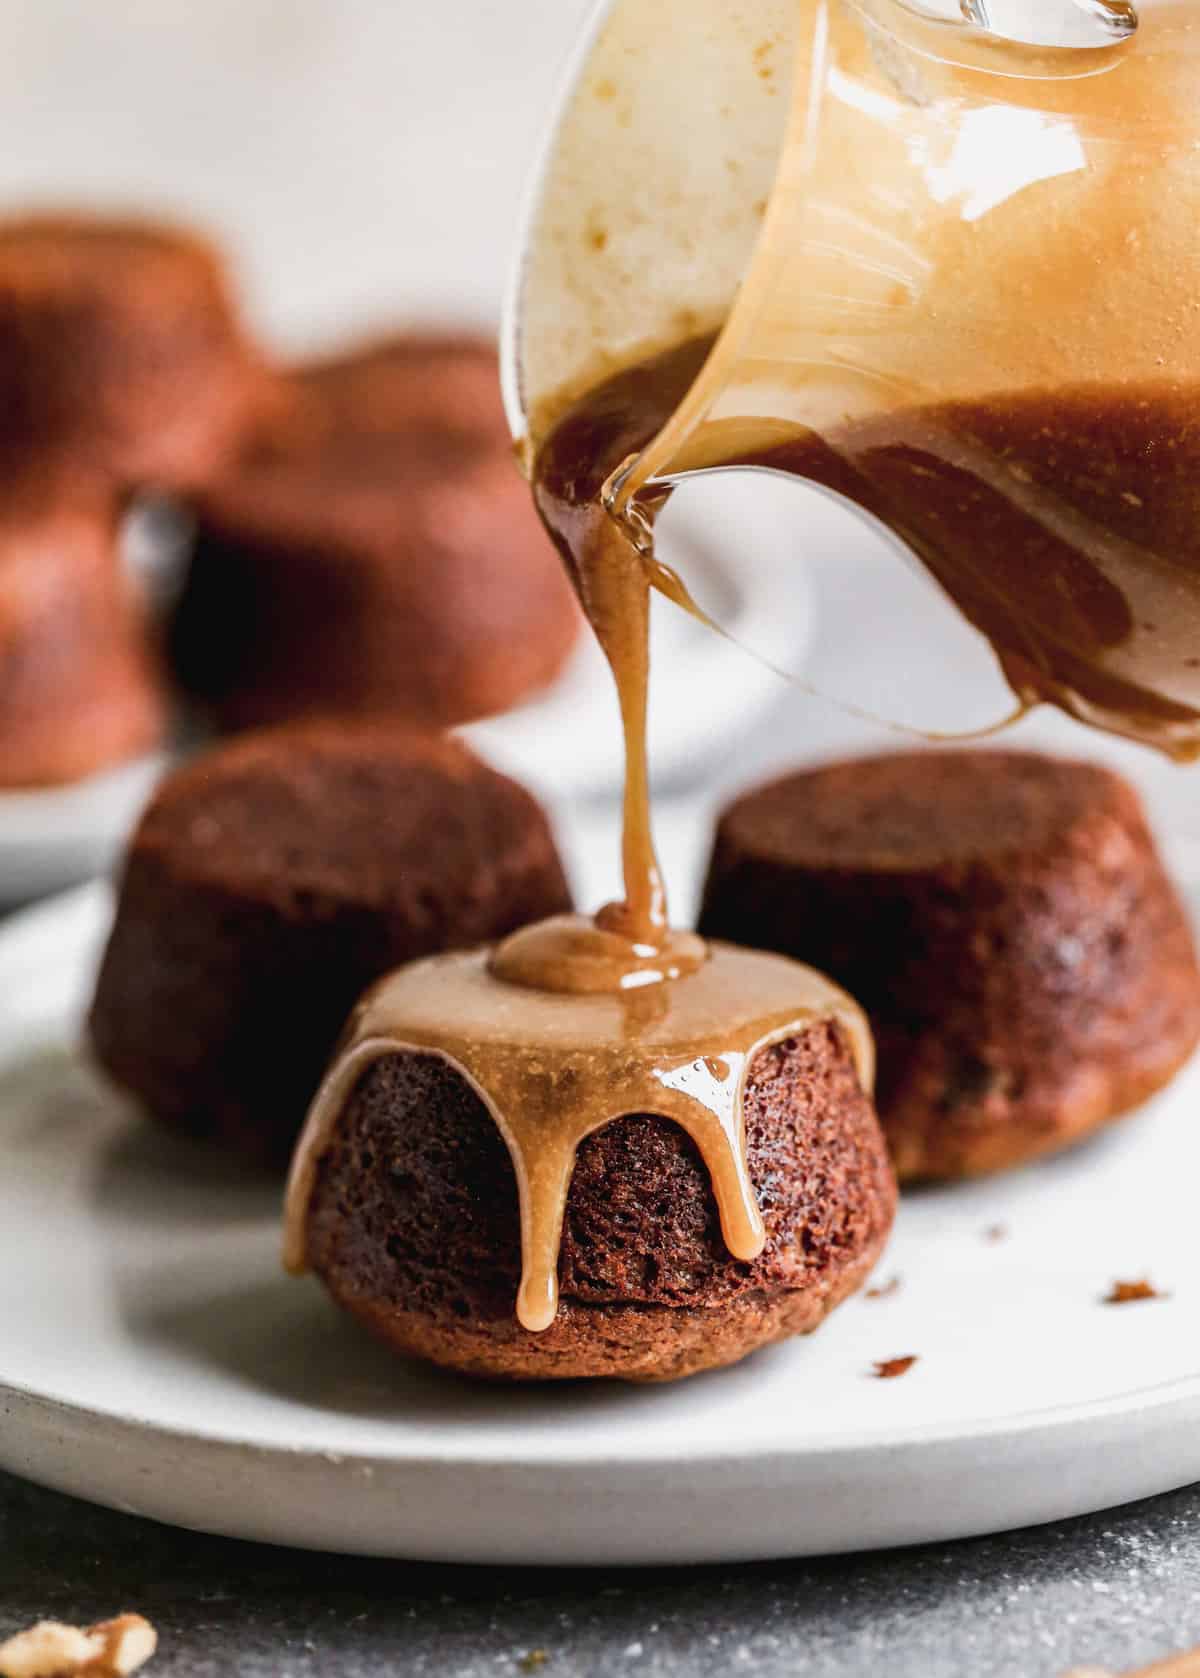
- Serve cakes flat-side up, with warm toffee sauce on top. Garnish with chopped walnuts, if desired, then serve with custard, ice cream, or whipped cream.
How to make Toffee Sauce:
- Combine heavy whipping cream, butter, brown sugar, and salt in a saucepan.
- Cook over low heat and stir until sugar dissolves and the sauce is smooth and slightly thickened. Remove from heat and stir in vanilla. Serve warm, over sticky toffee pudding.
Make Ahead and Freezing Instructions:
To Make Ahead: The cake and sauce can be made up to five days in advance, stored separately, in an air-tight container in the refrigerator. Rewarm in the microwave.
To Freeze: Place in an air-tight freezer container and freeze for up to 3 months.
Recipe Variations:
- Gluten-Free: Use 1 cup of gluten-free flour plus 1 ¼ tsp xanthan gum to help thicken the batter.
- Vegan: Replace butter with vegan butter. I recommend using vegan butter from a block and not a spread as it is thicker and results in a better texture. In place of the two eggs, use two tablespoons of flax seeds (ground into a fine powder) and six tablespoons of water. For a dairy-free alternative to the heavy whipping cream, mix together ¾ cup soy, almond, or coconut milk with ¼ cup olive oil or canola oil.
Follow me for more great recipes
Recipe

Sticky Toffee Pudding
Equipment
Ingredients
- 8 ounces medjool dates* , pitted
- 1 cup boiling water
- 1/3 cup butter , room temperature
- 2/3 cup light brown sugar , firmly packed
- 2 teaspoons vanilla extract
- 2 large eggs , room temperature
- 2 Tablespoons molasses
- 1 2/3 cups all-purpose flour
- 1 1/2 teaspoons baking powder
- 1 teaspoon baking soda
- ¼ teaspoon salt
Toffee Sauce*:
- 1/2 cup heavy whipping cream
- ½ cup butter
- 3/4 cup light brown sugar , packed
- 1 Pinch salt
- 2 tsp vanilla extract
- chopped walnuts , optional
Instructions
- Preheat the oven to 350 degrees F. Lightly grease a 12-cup muffin tin or ramekins.
- Add the dates to the bowl of a food process or blender and pour boiling water on top. Set aside for 5 minutes.
- Meanwhile, prepare the batter: Cream together butter and brown sugar. Add eggs, one at a time, beating after each addition. Add the molasses and vanilla and mix.
- Sift together the flour, baking powder and salt, and then stir into the batter.
- Pulse the date mixture in a food processor, then stir in baking soda. Pour date mixture into batter (no need to strain) and fold in gently to combine (don’t over-mix).
- Pour batter into prepared pan. Bake for about 18 – 20 minutes or until toothpick inserted in the center comes out clean or with few crumbs. Don’t overbake or cake will be dry. (For square baking pan, bake for 22-25 minutes).
- Serve muffin cakes flat-side up, with warm toffee sauce on top.
Toffee Sauce:
- Add cream, butter, brown sugar, and salt to a saucepan. Cook over low heat, stirring, until sugar dissolves and sauce is smooth, and slightly thickened about 7-10 minutes. Remove from heat and stir in vanilla.
- Spoon toffee sauce over cake and garnish with chopped walnuts, if desired.
- Store the cakes and sauce (in an airtight container) separately for up to five days in the refrigerator.
Notes
Nutrition
Create a FREE Account to save your favorite recipes and create meal plans
Follow Me
I originally shared this recipe December 2020. Updated October 2023.
This post contains affiliate links.


Very delicious! Whole family devoured it. I followed the recipe exactly.
This was delicious and easy My daughter and I had a fun time making it together. Will definitely make again and again.
Can you make just the batter in advance and store it in the fridge until the next day?
No, right when you mix the batter, the baking soda starts reacting and should be baked right away. If you mix it and wait, it will make the sticky toffee pudding not as fluffy and more dense. If you want to make it in advance, we recommend baking the cake (and the sauce can be prepped in advance too) then just reheating both when you’re ready to serve. Enjoy!
Served this for dessert at a little dinner party at my house and it was a big hit. That toffee sauce is so darn good! I couldn’t believe easy this was.
can you make without dates or prunes?
The dates or prunes contributes to the texture and sweetness so we recommend using them. If you make it without, let us know how it goes!
Just made your sticky toffee pudding (STP) and sauce. Easy to follow and so lucky to have my thrifted food processor. It looks and smells fabulous coming out of the oven and the sauce is perfect according to my daughter who has tried many a STP while living on the Cayman Islands.
Delicious 🤤