
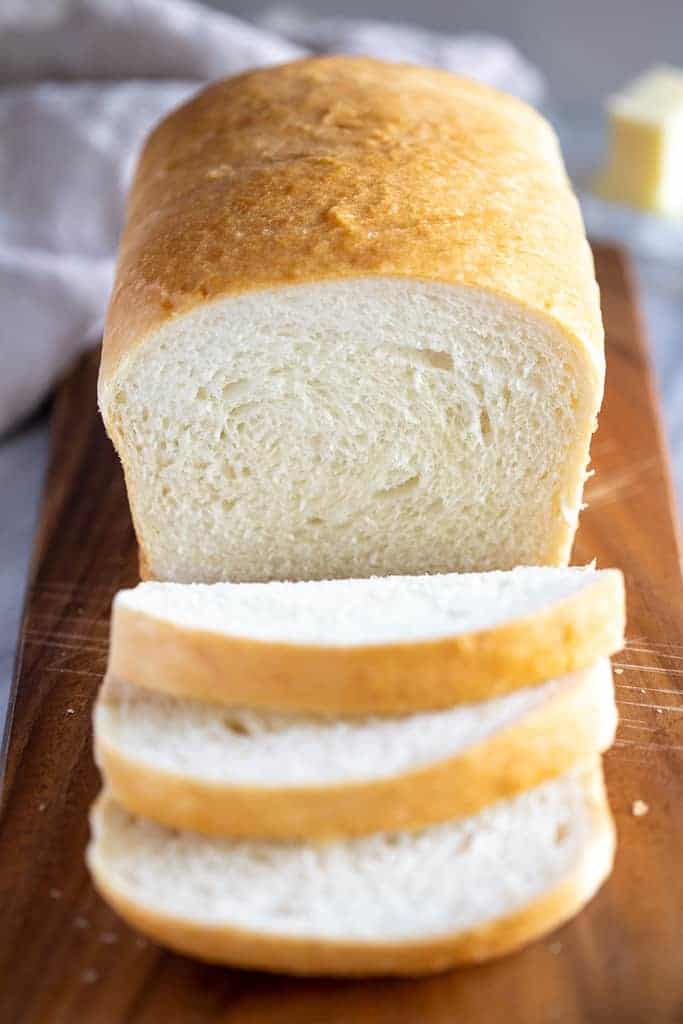
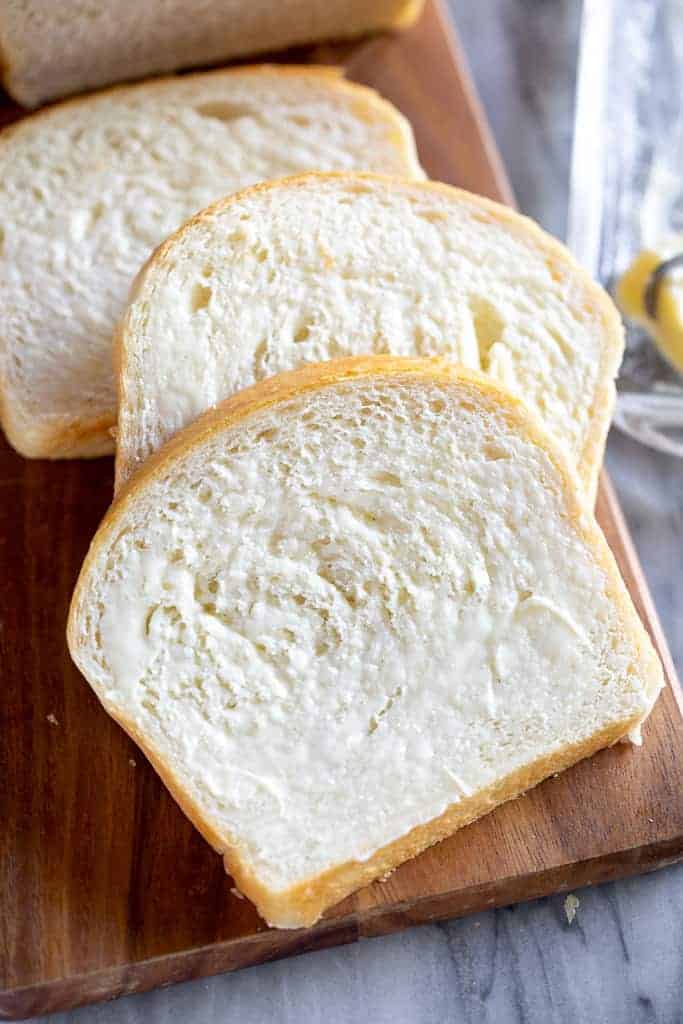
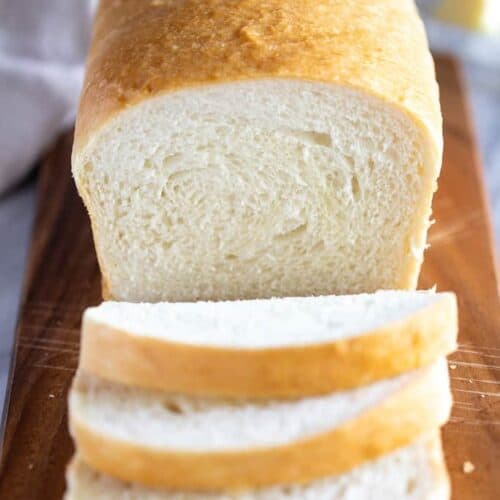
Look no further for the BEST and simplest homemade Bread recipe made with just six simple pantry ingredients! It’s the perfect white bread for sandwiches and it freezes well too!
Our favorite way to eat freshly baked bread is with homemade strawberry, raspberry, or peach jam. It’s simply heaven.
There are so many things to love about this bread recipe, but if I had to highlight the best parts, it’s that it only requires shelf stable ingredients (no milk, eggs or butter needed!) and it’s EASY and fool-proof to make! Whether you’re a newbie or experienced bread maker, you can’t mess this up, and I know you’re going to love it!
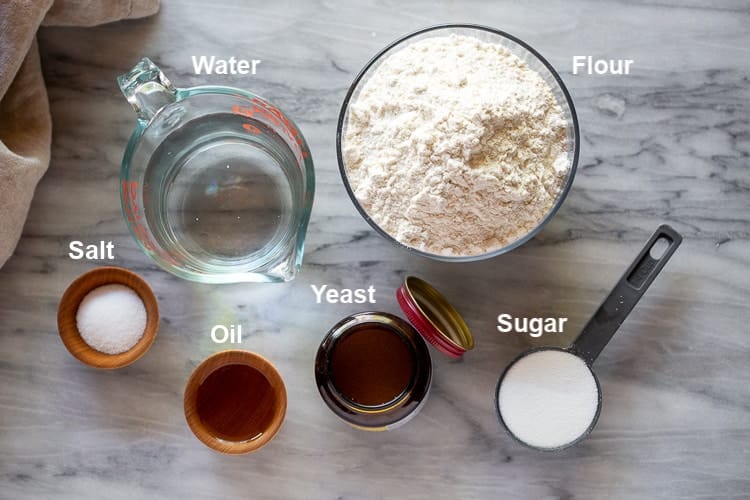
Ingredients needed:
- Warm water: (105-115 degrees)- to activate the yeast.
- Active Dry yeast: Instant or rapid rise yeast can be substituted, following my adaption notes in the recipe card.
- Granulated sugar or honey: the sugar is used to “feed” the yeast and tenderize the bread.
- Salt: to enhance flavor
- Oil: Vegetable or canola oil, or melted butter could be substituted
- Flour: Bread Flour or All-Purpose Flour can both be used with no changes to the recipe. The exact amount of flour used will vary depending on different factors (altitude/humidity etc.). What matters is the texture of the dough. It should be smooth and pull away from the sides of the bowl. It’s important not to add too much flour or your bread will be dense. The dough should be just slightly sticky when touched with a clean finger.
Pro Tips:
- Use fresh yeast! If your yeast is expired or bad, the bread will not rise properly. We will test it in step 1 of the recipe. Store yeast in the refrigerator to maintain best quality.
- To speed up the bread rise time: Make dough up to first rising, placing it in a well greased bowl, turning it once to grease the dough all over. Cover bowl with plastic wrap. Preheat oven to 180 degrees F, then turn oven off. Place bowl into the oven, leaving the oven door slightly cracked open. Allow to rise until doubled. Then remove, punch down and shape into loaves.
Do I need a Bread Maker or Stand Mixer?
NO! You don’t need any special equipment for this white bread recipe. If you have a stand mixer it makes the process easier, but you can simply use a mixing bowl and wooden spoon, and then knead the dough with your hands. You can use bread machine with this recipe if you have one, but you may need to cut the recipe in half (to make just 1 loaf), depending on your machines capacity.
How to make Bread:
- Proof the yeast: In a large bowl or stand mixer add the yeast, water and a pinch of the sugar or honey. Allow to rest for 5-10 minutes until foaming and bubbly. (This is called “proofing” the yeast, to make sure it is active. If it doesn’t foam, the yeast is no good, and you need to start over with fresh yeast).
- Prepare the dough: Add remaining sugar or honey, salt, oil, and 3 cups of flour. Mix to combine. Add another cup of flour and mix to combine. With the mixer running add more flour, ½ cup at a time, until the dough begins to pull away from the sides of the bowl.
- Knead the dough: Mix the dough for 5 minutes on medium speed (or knead with your hands on a lightly floured surface, for 5-8 minutes). The dough should be smooth and elastic, and slightly stick to a clean finger, but not be overly sticky.
- First Rise: Grease a large bowl with oil or cooking spray and place the dough inside. Cover with a dish towel or plastic wrap and allow to rise in a warm place* until doubled in size (about 1 ½ hours).

5. Punch the dough down really well to remove air bubbles.
6. Divide into two equal portions. Shape each ball into long logs and place into greased loaf pans.
7. Second rise: Spray two pieces of plastic wrap with cooking spray and lay them gently over the pans. Allow dough to rise again for about 45 minutes to one hour, or until risen 1 inch above the loaf pans.
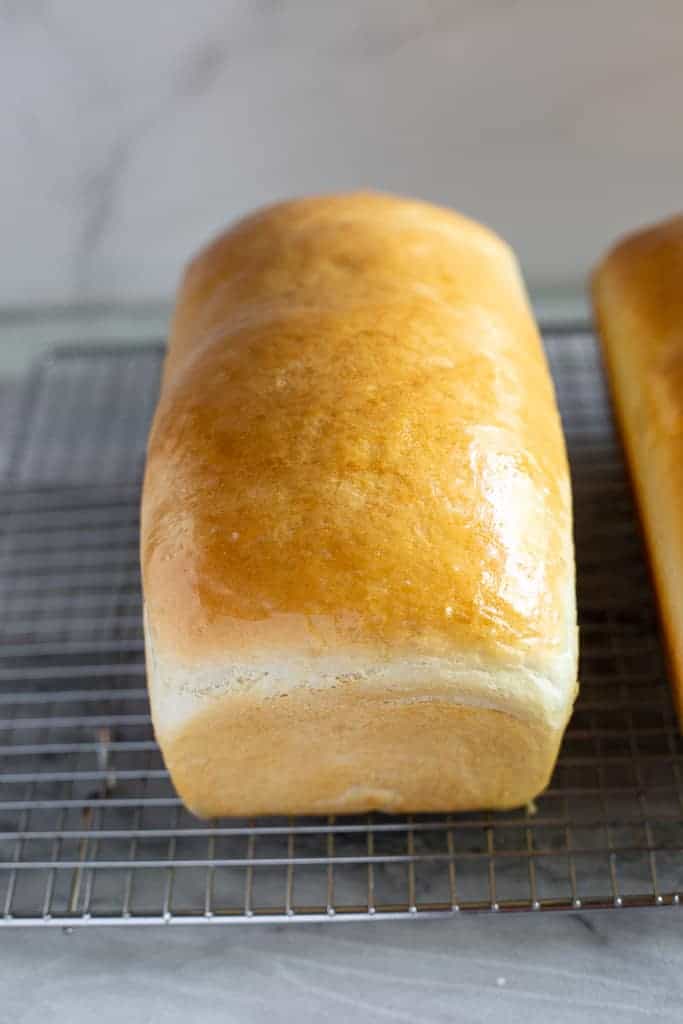
8.Bake: Adjust oven racks to lower/middle position. Preheat the oven to 350 F. Bake bread for about 30-33 minutes, or until golden brown on top. Give the top of a loaf a gentle tap; it should sound hollow.

Invert the baked loaves onto a wire cooling rack. Brush the tops with butter and allow to cool for at least 15 minutes before slicing.
Storing: Once cool, store bread in an airtight container or bag for 2-3 days at room temperature, or up to 5 days in the refrigerator.
Make Ahead And Freezing Instructions:
To make ahead: Make the bread dough through step 4, before the first rise. Place in a large airtight container, and refrigerate for up to one day. Remove from fridge and allow to come to room temperature. Proceed with punching down and forming loaves.
To freeze bread dough: Prepare the recipe through step (6), before the second rise. Place the shaped loaves into a freezer-safe or disposable aluminum bread pan. Cover tightly with a double layer of aluminum foil and freeze for up to 3 months. When ready to bake, allow the loaves to thaw and complete the second rise, at room temperature (about 5 hours). Bake as directed.
To freeze baked bread: Allow baked bread to cool completely. Place each loaf in a freezer-safe resealable bag and freeze for up to 3 months. Thaw at room temperature on the countertop, or overnight in the refrigerator.
Variations:
- Cinnamon swirl bread: After punching dough down and dividing into two pieces (step 7) roll each piece out into a large rectangle. Mix ¼ cup sugar and 2 teaspoons ground cinnamon together. Sprinkle the cinnamon sugar mixture on top, leaving a 1-inch border around the sides. Roll the dough up very tightly into a log. Pinch the ends to seal and place into prepared loaf pans, seam side down. Continue with step 8.
- Raisin Bread – Add 2 cups of raisins to the bread dough in step 3, then follow instructions above for adding cinnamon swirl.
- Rolls
- Breadsticks
- Whole Wheat Bread
- Artisan Bread
- Pizza Dough
 Uses for Leftover Bread:
 Uses for Leftover Bread:
Homemade bread will dry out after 2-3 days, but I have many recipes that use bread slices, including:
- Baked French Toast Casserole
- Bread Pudding
- Classic French Toast
- Bread Crumbs – Allow the bread to dry out completely, then pulse it into crumbs using a food processor or blender.
- Dried Bread Cubes for Stuffing
- Overnight Breakfast Casserole
You can also FOLLOW ME on FACEBOOK, TWITTER, INSTAGRAM and PINTEREST for more great recipes!
Recipe
Homemade Bread
Equipment
Ingredients
- 2 cups warm water (105-115 degrees) (474g)
- 1 Tablespoons active dry yeast*
- 1/4 cup honey or sugar (85g honey, 50g sugar)
- 2 teaspoons salt
- 2 Tablespoons oil (canola or vegetable)
- 4 - 5 1/2 cups all-purpose or bread flour* (500g-688g)
Instructions
- Prepare the dough: In a large bowl or stand mixer add the yeast, water and a pinch of the sugar or honey. Allow to rest for 5-10 minutes until foaming and bubbly. (This is called “proofing” the yeast, to make sure it is active. If it doesn’t foam, the yeast is no good, and you need to start over with fresh yeast).
- Add remaining sugar or honey, salt, oil, and 3 cups of flour. Mix to combine.
- Add another cup of flour and mix to combine. With the mixer running add more flour, ½ cup at a time, until the dough begins to pull away from the sides of the bowl. The dough should be smooth and elastic, and slightly stick to a clean finger, but not be overly sticky. Add a little more flour, if needed.
- Knead the dough: Mix the dough for 4-5 minutes on medium speed (or knead with your hands on a lightly floured surface, for 5-8 minutes).
- First Rise: Grease a large bowl with oil or cooking spray and place the dough inside, turning to coat. Cover with a dish towel or plastic wrap and allow to rise in a warm place* until doubled in size, about 1 ½ hours.
- Spray two 9x5'' bread pans generously with cooking spray on all sides. (I also like to line the bottom of the pans with a small piece of parchment paper, but this is optional.)
- Punch the dough down well to remove air bubbles. Divide into two equal portions. Shape each ball into long logs and place into greased loaf pans.
- Second rise: Cover pans with a lightweight, dry dish towel (or spray two pieces of plastic wrap generously with cooking spray and lay them gently over the pans). Allow dough to rise again for about 45 minutes to one hour, or until risen about 1 inch above the loaf pans. Gently removing covering.
- Bake: Preheat oven to 350 F. Bake bread for about 30-33 minutes, or until golden brown on top. Give the top of a loaf a gentle tap; it should sound hollow.
- Invert the loaves onto a wire cooling rack. Brush the tops with butter and allow to cool for at least 10 minutes before slicing.
- Once cool, store in an airtight container or bag for 2-3 days at room temperature, or up to 5 days in the refrigerator.
Notes
To freeze the dough: Prepare the recipe through step (6), before the second rise. Place the shaped loaves into a freezer-safe or disposable aluminum bread pan. Cover tightly with a double layer of aluminum foil and freeze for up to 3 months. When ready to bake, allow the loaves to thaw and complete the second rise, at room temperature (about 5 hours). Bake as directed.
To freeze baked bread: Allow baked bread to cool completely. Place each loaf in a freezer-safe resealable bag and freeze for up to 3 months. Thaw at room temperature on the countertop, or overnight in the refrigerator. Bread Machine: If using a bread machine, you may want to cut this recipe in half to make 1 loaf (depending on the capacity of your machine).
Nutrition
Create a FREE Account to save your favorite recipes and create meal plans
Have you tried this recipe?!
RATE and COMMENT below! I would love to hear your experience.
This post contains affiliate links.


Honestly, I’m a little upset. I made this recipe exactly as it is written, and now my family insists that I make bread ALL THE TIME. What have I done?!?!?
This is a great and simple homemade bread recipe. I am a chef and like to try new recipes, and this recipe is in my top 5 best recipes I have tried for homemade bread.
One of the absolute best recipes I’ve seen for homemade Bread. Turned out absolutely perfect and world’s better than any store bought bread.
Im wanting to use active yeast from a dough starter whats the conversion
This recipe turned out perfect! I brushed the loaf with melted butter and sprinkled on some sea salt.
I am sitting here eating a grilled cheese sandwich with my first ever homemade bread, and it is amazing!
If I use half the dough for a loaf of bread, and the other half for cinnamon rolls, do you think that the cinnamon rolls will turn out ok?
Hi Beverly, I wouldn’t use this white sandwich style bread for cinnamon rolls, as it wont be the sweet tender dough you want for those. I’d recommend using it for breadsticks, garlic knots, or rolls instead…
Okay, thanks for the advice!!
I am late to the bread game but this has become my tried a true weekly recipe for the last month! As I live alone, I find the bread going stale before I can use a whole loaf. Any tips for storage? I’m currently using paper bread bags.
Hi Kelly! I just use these plastic bread bags (https://amzn.to/40VWa0o). Try to remove as much air as you can before you fasten the tie and store on the counter. It will dry out faster in the fridge. Homemade bread will always dry out quicker than store-bought bread because it doesn’t have the preservatives and artificial ingredients. When our bread goes stale, we enjoy French Toast, Bread Pudding, or just pulse the dried bread in a food processor and use it for breadcrumbs in your baking. We are so happy you are enjoying this bread recipe!
Me too , on the late game , but I am finding it so rewarding
This recipe is by far the best simple sandwich bread that I’ve tried. It’s super versatile for a dinner bread or sandwiches. Simple instructions that yield exactly what the recipe says. Worth the try.
This is THE best!!! Everyone loves this recipe (including the picky eaters!). It is also SUPER easy to make and very forgiving. Give it a try!! I absolutely recommend brushing all sides (not just the top) with butter as soon as it is out of the oven. SO DELICIOUS!!
My second rise didn’t seem to go well and now baking it’s not rising or brown either? Could it be too much flour?
Did it deflate at all (maybe it was touched, or plastic wrap covering stuck on the dough? Or did it not rise at all for the second rise?
I swapped sugar for honey (I am a bee keeper). After rising, the dough seems wetter. Should I I have added more flour?
You can proof the dough in a microwave with the door laft ajar and the light on – just enough warmth for a perfect rise.
Hello! This bread is delicious, we love it but mine is very crumbly even on day 1. Is that normal?