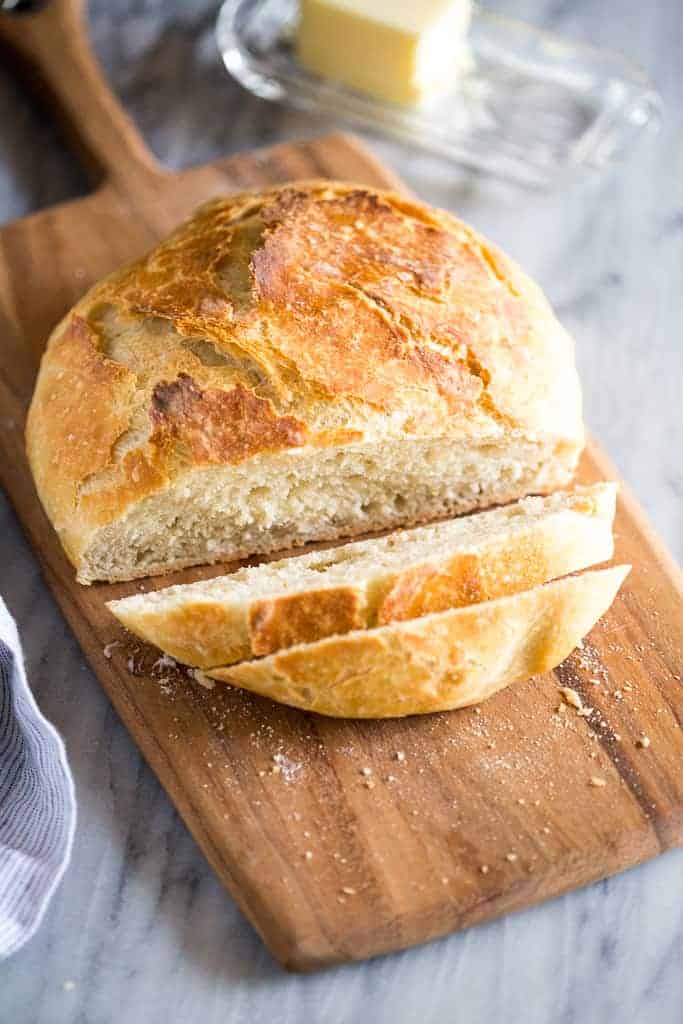
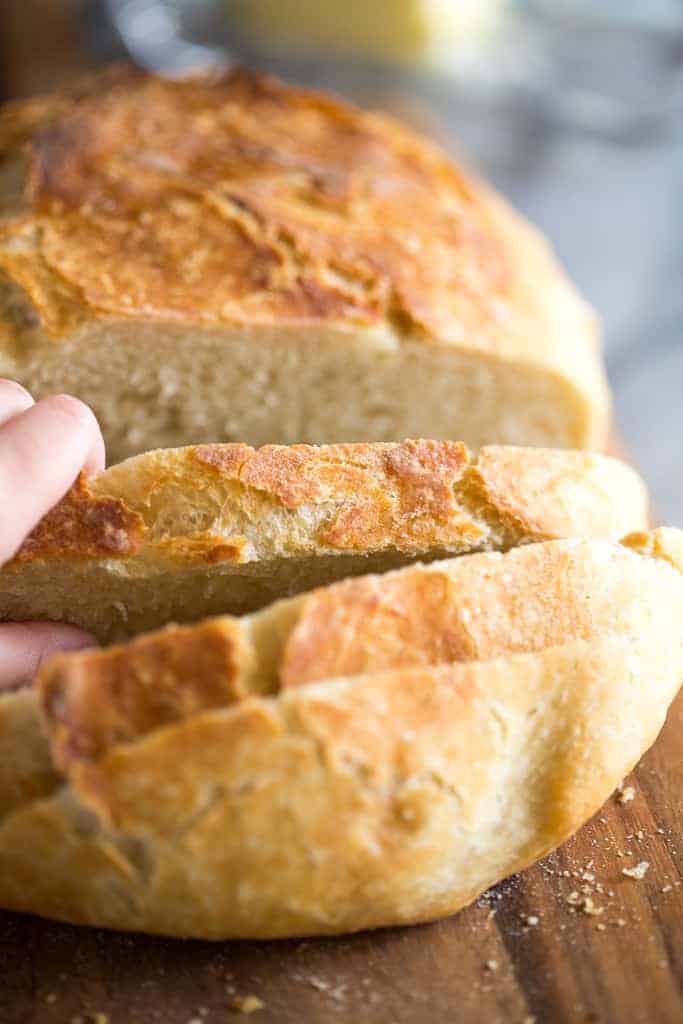
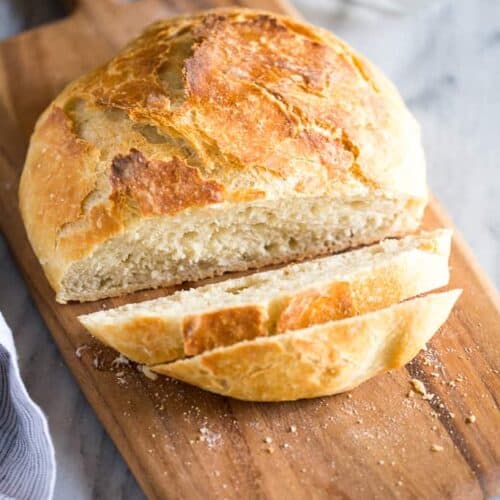
This quick and easy No Knead Bread has a crisp artisan crust and is extra soft and tender inside. It only requires four ingredients and couldn’t be easier to make.
Nothing beats the smell of homemade bread! It will amaze you how quick and easy it is to make this No Knead Bread and you can make the bread dough without any special tools!! My other favorite bread recipes include Honey Whole Wheat Bread and Easy Banana Bread.
I have included some variations for making this No Knead Bread. You can make the bread dough even healthier by using whole wheat flour (see directions below) or add a variety of different flavors to the dough. You can also choose to bake it on a baking sheet or in a cast iron pan!
It’s hard to believe there is absolutely no kneading required to make this bread, but you have to try it! I’m confidant you’ll “wowed” by how easy this bread is to make!
How to make No Knead Bread:
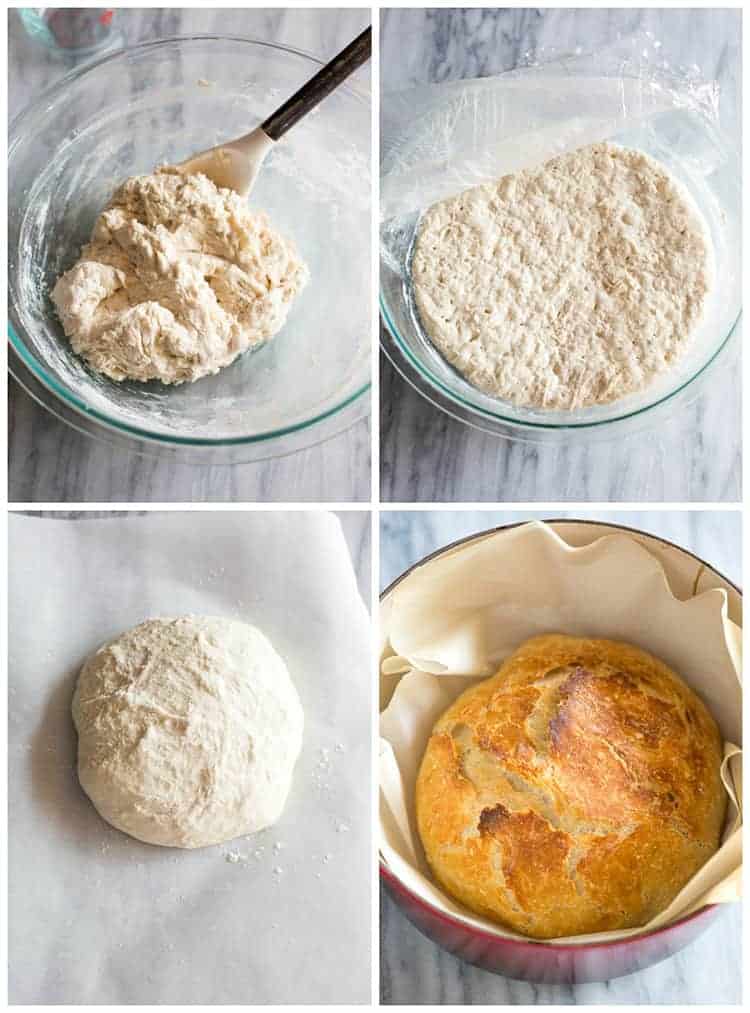
- In a large mixing bowl, combine flour, salt and yeast. Pour in warm water and stir with a wooden spoon until well combined. The dough will be sticky. Cover the bowl and allow it to rise at room temperature for 3-4 hours, or in the refrigerator for up to 15 hours.
- Scoop dough onto a floured work surface and shape into a ball. Sprinkle a tiny bit of flour on top of the dough ball and place it on a piece of parchment paper. Cover the dough lightly with plastic wrap. Allow to rise for 30 minutes.
- Meanwhile, place an empty cast iron pot, with the lid on, into the oven and preheat oven to 450 degrees F.
- Remove covering from dough ball. Lift the parchment paper and dough ball up, and place inside cast iron pot that’s been preheating in the oven. Cover with lid and return to oven to bake for 30 minutes.
- After 30 minutes, remove lid and bake, uncovered for 12-15 more minutes, until golden on top. Remove from oven and allow bread to cool on a wire cooling rack.
- Store bread in an open paper bag on the counter for up to 1 week.
- Baked (and cooled) loaves of bread can be frozen for up to 3 months.
No Cast Iron Pan? Use a Baking Sheet!
- Make the dough as directed, including allowing it to rise. Place it on a greased baking sheet.
- Add three cups boiling water to a 9×13 pan and set it on the lowest rack of your oven. The water will create steam which will help keep the bread crusty on the outside as it bakes. Bake for about 30-35 minutes.
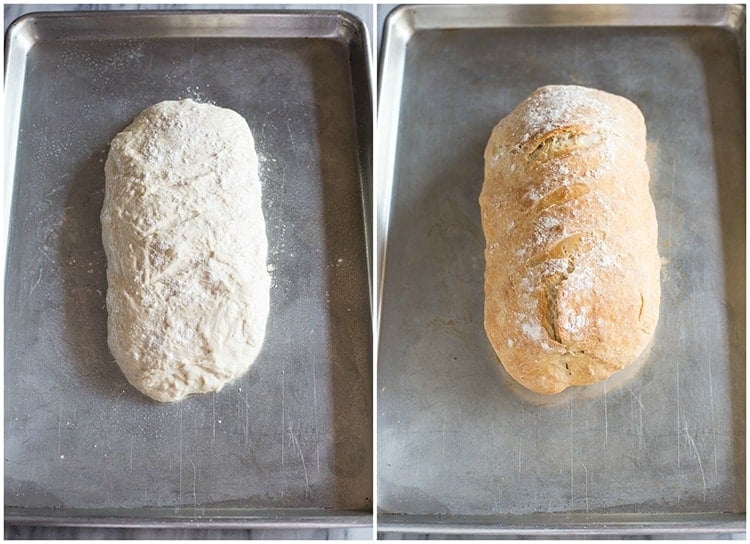
The result is the same delicious, crusty bread, and I love that you can really shape the dough any way you like when you use this method. I shaped mine into a log and I cut 3 very shallow diagonal slits in the top (optional). I felt like I was eating my own homemade version of a La Brea baguette!
Variations:
- Whole Wheat Flour: For best results, use half whole wheat flour and half white flour. Try stirring in 2 tablespoons of honey to the warm water, for a flavor boost. Make and bake as directed.
- Mix-Ins (add to the flour mixture, before adding water):
- 3 large cloves minced garlic plus 2 Tablespoons fresh chopped rosemary,
- 1 cup favorite kind of shredded cheese (try adding a chopped jalapeño!)
- ¾ cup dried cranberries and/or chopped nuts.
Freezing Instructions:
Make the dough and place in a freezer-safe bag. Freeze for up to 3 months. Thaw completely in the refrigerator, then allow to rise for 30-45 minutes at room temperature before baking. Baked (and cooled) loaves of bread can also be frozen for up to 3 months.
Follow me for more great recipes
Recipe
No Knead Bread
Ingredients
- 3 cups all-purpose flour
- 2 teaspoons coarse sea salt
- 1/2 teaspoon active dry yeast (or instant yeast)
- 1 ½ cups warm water (about 110 degrees F)
Instructions
- In a large mixing bowl, combine flour, salt and yeast. Pour in warm water and stir with a wooden spoon until well combined. The dough will be sticky. Cover the bowl and allow it to rise at room temperature for 3-4 hours, or in the refrigerator for up to 15 hours.
- Scoop dough onto a floured work surface and shape into a ball. Sprinkle a tiny bit of flour on top of the dough ball and place it on a piece of parchment paper. Cover the dough lightly with plastic wrap. Allow to rise for 30 minutes.
- Meanwhile, place an empty dutch oven/cast iron pot*, with the lid on, into the oven and preheat oven to 450 degrees F.
- Remove covering from dough ball. Lift the parchment paper and dough ball up, and place inside cast iron pot that’s been preheating in the oven. Cover with lid and return to oven to bake for 30 minutes.
- After 30 minutes, remove lid and bake, uncovered for 12-15 more minutes, until golden on top. Remove from oven and allow bread to cool on a wire cooling rack.
- Store bread in an open paper bag on the counter for up to 1 week.
Notes
- 3 large cloves minced garlic plus 2 Tablespoons fresh chopped rosemary,
- 1 cup favorite kind of shredded cheese (try adding a chopped jalapeño!)
- ¾ cup dried cranberries and/or chopped nuts.
Nutrition
Create a FREE Account to save your favorite recipes and create meal plans
This post contains affiliate links.


I made this bread (dutch oven version). It is a bit gummy in texture…any suggestions?
Did you slice the bread when it was still warm? It’s best if you let it cool completely before slicing.
Can I make this bread in a standard loaf pan? I like the crumb of this bread but would prefer a more sandwich-sized slice. If I use a loaf pan, would it have to be cast iron so it could be pre-heated in a 450 degree oven?
This was so easy and I used a baking sheet with a pan of water and it’s delicious!
I followed the recipe as written. It was delicious! The bottom was a bit crusty hard as other reviews stated, but that’s part of the goodness. Will make this again with the recommended additions.
Dividing the dough to make rolls, how long at what temp?
We haven’t tested this recipe for rolls. Let us know how they turn out if you try them, or try our favorite dinner rolls: https://tastesbetterfromscratch.com/best-homemade-rolls/ or garlic rolls: https://tastesbetterfromscratch.com/garlic-rolls/.
I’ve never made bread before. It was easy and turned out better than I expected. Only issue I had was the bottom was hard to cut through.
I will be making it again. Probably just need to adjust temp and time for my oven.
Once I get it figured out I think this will be a camping staple.
Tyvm
Randy S